A Snippet About The Main Writer


Julian Chong

18, Male, Malaysian. Single and available. Loves God, music, guitars, Gunpla, photography. Loves his friends too~

Jules' Photo Reel

Leave Your Message


ShoutMix chat widget

Jules' Personal Blog

Traffic Feed

Showing posts with label Flowers. Show all posts

Sunday, August 30, 2009

Time For Change~

Nikon D90 with AF-S Nikkor 18-105mm VR lens, 1/2500 seconds @ f/22, ISO 100

Yo~
'Sup people!
As you may have noticed...
This blog's entire layout has been redesigned~
Whoohooo!!!
Credits goes to my brother, Jaryl, for helping me design it and coming up with all the HTML coding and whatnot~

Have added a few stuff to this blog of mine...
Firstly...
It's now a 3 column layout instead of 2...
Second...
At the end of each post there will be a link that can let you view the full whole post...
I've asked my bro to add that in to avoid having such long posts being displayed...
Clicking on the link will take you to another page where the full post will be displayed...
(link is titled: "Click here to read the rest of this post")

It's still not really finished yet...
Still need to get my co-writer to do up his column on the right...
So Juchiro...
If you are reading this get it done ba~

Here are some photo's that I've been taking...


The following 6 photos were taken when I went with Richard to KL for a photography outing...
Nikon D90 with AF-S Nikkor 18-105mm VR lens, 1/30 seconds @ f/3.5, ISO 1600

Nikon D90 with AF-S Nikkor 18-105mm VR lens, 1/200 seconds @ f/3.5, ISO 100

Nikon D90 with AF-S Nikkor 18-105mm VR lens, 1/640 seconds @ f/3.5, ISO 100

Nikon D90 with AF-S Nikkor 18-105mm VR lens, 1/40 seconds @ f/5.0, ISO 100

Nikon D90 with AF-S Nikkor 18-105mm VR lens, 1/10 seconds @ f/4.2, ISO 1600

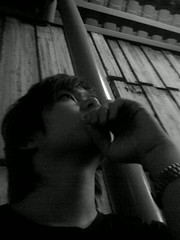
Nikon D90 with AF-S Nikkor 18-105mm VR lens, 3.3 seconds @ f/22, ISO 1600

The next 4 photos were taken at Lake Gardens...


Nikon D90 with AF-S Nikkor 18-105mm VR lens, 1/400 seconds @ f/5.3, ISO 200

Nikon D90 with AF-S Nikkor 18-105mm VR lens, 1/250 seconds @ f/5.3, ISO 200

Nikon D90 with AF-S Nikkor 18-105mm VR lens, 1/60 seconds @ f/5.0, ISO 200

Nikon D90 with AF-S Nikkor 18-105mm VR lens, 1/6 seconds @ f/22, ISO 100

This photo was taken at Skybar, Traders Hotel...
Nikon D90 with AF-S Nikkor 18-105mm VR lens, 1.4 seconds @ f/3.8, ISO 1250

The rest of the photos here were taken at my college's campus...

Nikon D90 with AF-S Nikkor 18-105mm VR lens, 1/4000 seconds @ f/3.8, ISO 100

Nikon D90 with AF-S Nikkor 18-105mm VR lens, 1/4000 seconds @ f/5.0, ISO 500

Nikon D90 with AF-S Nikkor 18-105mm VR lens, 1/640 seconds @ f/3.5, ISO 100

Nikon D90 with AF-S Nikkor 18-105mm VR lens, 1/60 seconds @ f/3.5, ISO 400

Nikon D90 with AF-S Nikkor 18-105mm VR lens, 1/3200 seconds @ f/4.2, ISO 200

Nikon D90 with AF-S Nikkor 18-105mm VR lens, 1/3200 seconds @ f/3.5, ISO 200

Nikon D90 with AF-S Nikkor 18-105mm VR lens, 1/40 seconds @ f/5.6, ISO 400

Well...
That's all I have~
I'll try to get the layout done as soon as possible...
Ciaos!!

----------------------------------------------------------------

Quote of the day:
"Photography is about finding out what can happen in the frame... When you put four edges around some facts, you change those facts..."
-Gary Winogrand-

Click here to read the rest of this post

Thursday, July 16, 2009

Jules' 10 Minute Photoshop Lesson: Selective Coloring

Yo~
Wassup people~

As per my title...
I'll be starting a series of simple Photoshop lessons that you (yes, you!) can use in editing your images...

Well...
Without further ado...
Let's start the first lesson~

*note*
Enlarge the pictures to view them if needed


Today I'll be teaching you guys how to do:

Selective Coloring

This technique will help make your subject stand out more...
This is an example what a picture will look like if the selective coloring technique is applied:

Before:
After:

Looks complicated?
To be honest it's not actually...
In fact it's quite simple...
Just follow these simple steps and you should be able to do it:

1. Open your Photoshop CS3/CS4 or any other version of Photoshop.
(I'm using CS4)

2. Open your image file. (Don't need me to teach you how to open your image file right?)

3. Choose a subject that you wish to have its colors remain while the rest are in black and white. In this case mine would be the beer bottle and the cup.

4. Zoom in to an area of choice to make outlining the subject of choice easier. Hold 'Ctrl+Space Bar' and left click (hold it down as well), then drag the mouse til you see a box. (as pictured below)

5. Select the 'PEN' tool. This can be found on the toolbar on the left of the Photoshop window or you can just press 'P' on your keyboard. Also make sure that the 'Pen' tool has been selected to 'Paths' mode. (pictured below, marked by red circle)

6. Select a starting point where you want to start from by left clicking your mouse. A small square box should appear (as pictured below, marked by red circle). You will need to do this in order to select the subject.

7. Left click (don't let go of it) on a next point and drag the mouse around to get a curved line. Just left clicking alone will result in a straight line. The reason why we want to do curved lines is so that the final result won't appear rough around the corners/curved areas. Keep dragging the mouse around until you are satisfied with the outlining. (pictured below)

*note*
Read step 8 before proceeding to outline the whole subject.


8. Press and hold 'Alt' and click on the middle box. (as pictured below, marked by red circle)

Before middle box is clicked on:
After middle box is clicked:

9. Repeat step 6 and 7 until the desired subject is fully outlined. The way to tell if your subject has been fully outlined is that there are no more square boxes remaining. To fully outline your subject, just click back on the starting point where you started the outline. Make a curved line if necessary. (pictured below)

Not fully outlined subject:Fully outlined subject:
10. Right click on any part of the image and click on 'Make selection...'

11. A small window should appear on your screen now. Just change the settings (if required) to the same as the picture below and click 'Ok'.

12. Next, click on the 'Select' tab (found on the top of the Photoshop window) and click on 'Inverse' or you can just press and hold 'Shift+Ctrl+I' for the short cut.

13. Next, click on the 'Image' tab (found on the top of the Photoshop window), select 'Adjustments', and click on 'Black & White...' or press and hold 'Alt+Ctrl+Shift+B' for the shortcut. A window should appear for you to adjust as to how black or white a color should be. For me I like to use the 'Maximum Black' setting so that the subject stands out more. When you are done just click 'Ok'. (pictured below)

Window for custom black and white editing:
14. You are finished and ready to save your file~
(don't need me to teach you how to save a file right!)


Here are some examples as to when to use the selective coloring technique:

1. Distracting background

Before:
After:

Before:After:
2. Bringing the focus on to a certain subject

Before:
After:

Before:

After:

3. Pictures with colorful characters in it

Before:

After:
.................................................................................................................

There we go~
Pretty simple wasn't it?
Leave a comment if you don't understand anything...

There is another way to do this actually...
Read about it here...

That's all for today folks~
Til next time~

................................................................................................................

Quote of the day:
"Experience is the best teacher of all... And for that, there are no guarantees that one will become an artist... Only the journey matters..."
-Harry Callahan-

Click here to read the rest of this post

Wednesday, June 10, 2009

Photography Outing @ KLCC (Day 2)


Day 2 of my photography outing with Richard @ KLCC was a very productive one~

We actually wanted to go up to the Skybridge today...
And there were tickets available...
But the earliest time available to go up was 6pm...
And I had to be back home by then...

So we decided not to go up to the bridge but just walk around the park AGAIN...
But this is where it gets interesting...
(you can just skip this part if you've already read about it at my personal blog)

There was this group of Malays (who were also photographers) asked whether we wanted to join them in their model photoshoot~
We were a bit hesitant at first...
But since this was a great opportunity to shoot some "real" models, get to know other photographers around Malaysia, learn some new things, and get some good exposure...
We decided to tag along...

It was a blessing in disguise...
If me and Richard had gone up the Skybridge we would've missed them...
They said they would call us if there is any event or photoshoot in the future~
So it was a good thing we didn't go up the Skybridge~

Anyway...
Without further a due...
Here are the photos from Nikki~

Nikon D90 w/ Nikkor AF-S 18-105mm VR lens, 1/125 seconds @ f/6.3 , ISO 200

Nikon D90 w/ Nikkor AF-S 18-105mm VR lens, 1/80 seconds @ f/10, ISO 320

Nikon D90 w/ AF-S Nikkor 18-105mm VR lens, 1/160 seconds @ f/10, ISO 320

Nikon D90 w/ Nikkor AF-S 18-105mm VR lens, 1/400 seconds @ f/10, ISO 320

Nikon D90 w/ Nikkor AF-S 18-105mm VR lens, 1/125 seconds @ f/9, ISO 320

Nikon D90 w/ Nikkor AF-S 18-105mm VR lens, 1/200 seconds @ f/14, ISO 320

Nikon D90 w/ Nikkor AF-S 18-105mm VR lens, 1/200 seconds @ f/10, ISO 320

Nikon D90 w/ Nikkor AF-S 18-105mm VR lens, 1/100 seconds @ f/6.3, ISO 320

Nikon D90 w/ Nikkor AF-S 18-105mm VR lens, 1/125 seconds @ f/7.1, ISO 320

Nikon D90 w/ Nikkor AF-S 18-105mm VR lens, 1/125 seconds @ f/5.6, ISO 320

Nikon D90 w/ Nikkor AF-S 18-105mm VR lens, 1/125 seconds @ f/5.6, ISO 320

Nikon D90 w/ Nikkor AF-S 18-105mm VR lens, 1/100 seconds @ f/20, ISO 320

Nikon D90 w/ Nikkor AF-S 18-105mm VR lens, 1/80 seconds @ f/13, ISO 320

Nikon D90 w/ Nikkor AF-S 18-105mm VR lens, 1/80 seconds @ f/13, ISO 320

Nikon D90 w/ Nikkor AF-S 18-105mm VR lens, 1/125 seconds @ f/5.6, ISO 320

I actually have a lot more photos from the model photoshoot...
But there is just too much too upload...
I shot over 1000 frames within 3 hours!
The ones here are the best of the best out of the whole lot...

The following photos are just some randoms shots that I took after the model photoshoot...

Nikon D90 w/ Nikkor AF-S 18-105mm VR lens, 1/125 seconds @ f/9, ISO 320, EV +1.3

Nikon D90 w/ Nikkor AF-S 18-105mm VR lens, 1/30 seconds @ f/18, ISO 320, EV +1.3

Nikon D90 w/ Nikkor AF-S 18-105mm VR lens, 1/20 seconds @ f/22, ISO 320, EV +1.3

Nikon D90 w/ Nikkor AF-S 18-105mm VR lens, 1/30 seconds @ f/22, ISO 320, EV +1.3

Nikon D90 w/ Nikkor AF-S 18-105mm VR lens, 1/30 seconds @ f/13, ISO 320, EV +1.3

Nikon D90 w/ Nikkor AF-S 18-105mm VR lens, 1/40 seconds @ f/32, ISO 320, EV +1.3

Nikon D90 w/ AF-S Nikkor 18-105mm VR lens, 1/320 seconds @ f/22, ISO 320, EV +1.3

Nikon D90 w/ Nikkor AF-S 18-105mm VR lens, 1/320 seconds @ f/5.6, ISO 250

Nikon D90 w/ Nikkor AF-S 18-105mm VR lens, 1/250 seconds @ f/5.6, ISO 250

Nikon D90 w/ Nikkor AF-S 18-105mm VR lens, 1/250 seconds @ f/25, ISO 250

Nikon D90 w/ Nikkor AF-S 18-105mm VR lens, 1/25 seconds @ f/4.8, ISO 500, EV +5


Here are some photos of the models that Richard took...

Canon 500D w/ Canon 55-250mm at 84mm, 1/200 seconds @ f/4.5, ISO 400

Canon 500D w/ Canon 55-250mm at 100mm, 1/160 seconds @ f/5.6, ISO 400

Canon 500D w/ Canon 55-250mm at 163mm, 1/800seconds @ f/5.6, ISO 400

Canon 500D w/ Canon 18-55mm at 38mm, 1/640 seconds @ f/5.6, ISO 400

Canon 500D w/ Canon 55-250mm at 154mm, 1/800 seconds @ f/5.6, ISO 400

Canon 500D w/ Canon 55-250mm at 116mm, 1/1000seconds @ f/5.0, ISO 400

Canon 500D w/ Canon 55-250mm at 146mm, 1/160 seconds @ f/5, ISO 400

Canon 500D w/ 55-250mm at 163mm, 1/320 seconds @ f/5.6, ISO 100

Canon 500D w/ Canon 50mm, 1/800 seconds @ f/1.8, ISO 100

Canon 500D w/ Canon 55-250mm at 90mm, 1/200 seconds @ f/4.5, ISO 100

Canon 500D w/ Canon 55-250mm at 214mm, 1/125 seconds @ f/5.6, ISO 100

Canon 500D w/ Canon 55-250mm at 250mm, 1/400 seconds @ f/5.6, ISO 100

Canon 500D w/ Canon 55-250mm at 250mm, 1/160 seconds @ f/5.6, ISO 100

Canon 500D w/ Canon 50mm, 1/640 seconds @ f/2.2, ISO 100


And this concludes day 2 of my photography outing~
'Til next time people~
Ciaos!

----------------------------------------------------------------------

Quote of the day:
"Photography is more than a medium for factual communication of ideas... It is a creative art..."
-Ansel Adams-

Click here to read the rest of this post